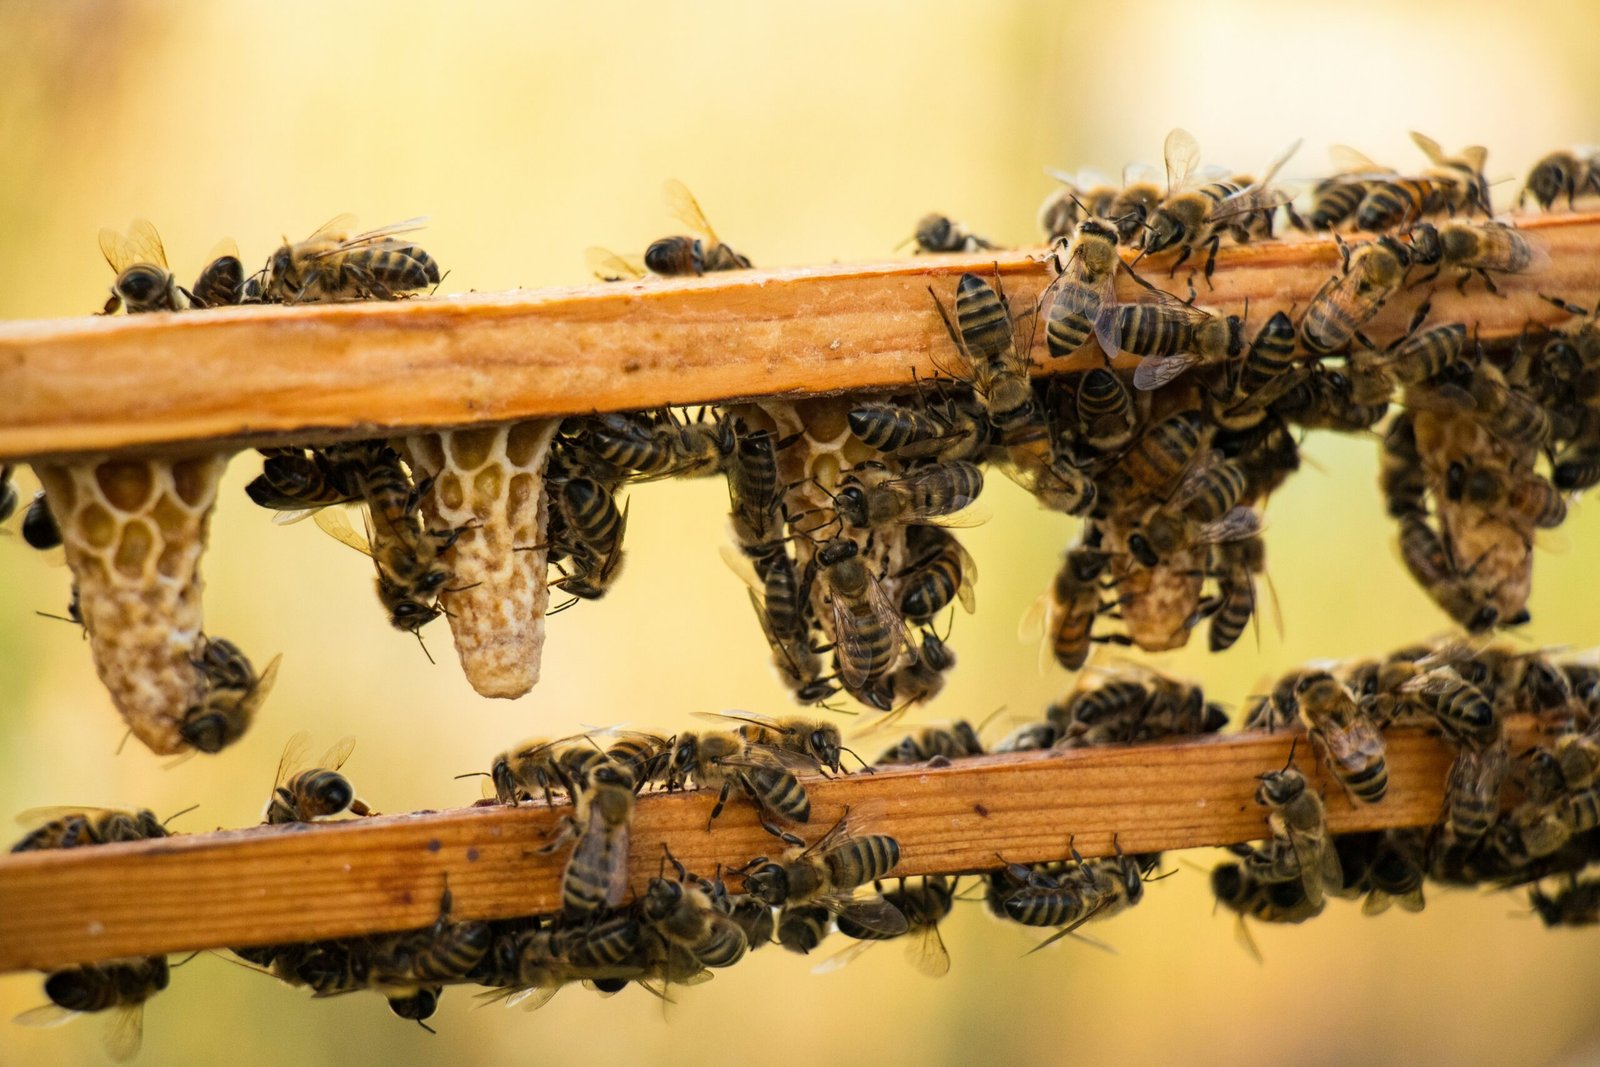
Finding queen cells during a routine hive inspection can make any beekeeper’s heart skip a beat. However, before taking action, carefully inspect where the cells are located and what stage they are in.
Step 1: Check the Position on the Frame
- On the Face or Middle of the Frame (Supersedure Cells): If your queen cells are hanging from the main face or center of the comb, they are likely supersedure cells. This means the worker bees have decided to replace the current queen—either because she is old, laying poorly, or has already died. In a natural supersedure, workers will eventually reject the old queen and allow a new one to take over.
- Along the Bottom or Edges of the Frame (Swarm Cells): If you find multiple cells hanging vertically along the bottom bar or outer edges of the frame, these are active swarm cells. The colony is healthy, likely overcrowded, and preparing to split. The current queen will take roughly half the worker population and fly off to start a new colony, leaving these cells behind.
Step 2: Inspect the Cell (Play Cup vs. Active Cell)
Hold the frame up and gently tilt it to look directly inside the opening.
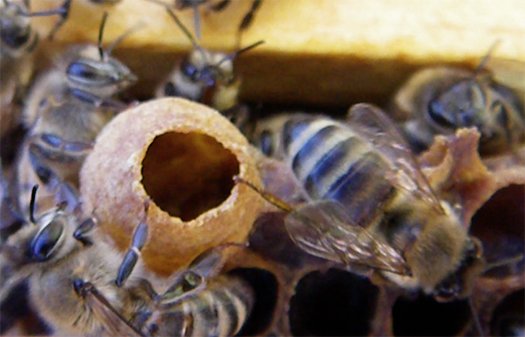
shawn caza @ http://www.beekeeping.isgood.ca Creative Commons Attribution-Share Alike 3.0
- Play Cups: An open, peanut-shaped cell that is completely empty inside is known as a play cup. Bees build these regularly as practice or in preparation. Empty play cups are nothing to worry about.
- Active Cells: If you look inside an open cell and see a white larva floating in royal jelly, or if the cell is completely sealed over, it is an active queen cell.
Important Warning: Do not squash or remove active supersedure cells! Removing them risks leaving the colony hopelessly queenless. If a colony remains without a queen for too long, worker bees may eventually start laying unfertilised eggs. Because workers haven’t mated, they can only lay eggs that turn into drones, leading to colony failure.
The Mating & Laying Timeline: When to Check Back
Once you leave an active queen cell in the hive, leave the colony alone. Virgin queens are timid and easily disoriented; opening the hive while she is emerging or returning from a mating flight can result in her getting lost or balled by her own bees.
- Emergence: A capped queen cell hatches around 16 days after the egg was initially laid (roughly 7–8 days after the cell is sealed).
- Mating Flights: The new virgin queen needs 5 to 7 days after emerging to mature before she takes her nuptial flight.
- First Eggs: She needs good, warm weather (ideally above 18°C) to mate with drones. Once successfully mated, she will take another 3 to 7 days to begin laying.
Total Waiting Period: Expect it to take 2 to 3 weeks from the time a queen cell hatches before you see new eggs or open brood. Avoid inspecting the brood box for at least 14 to 21 days after you estimate she has emerged.
The Entrance Signal: Watching for Pollen
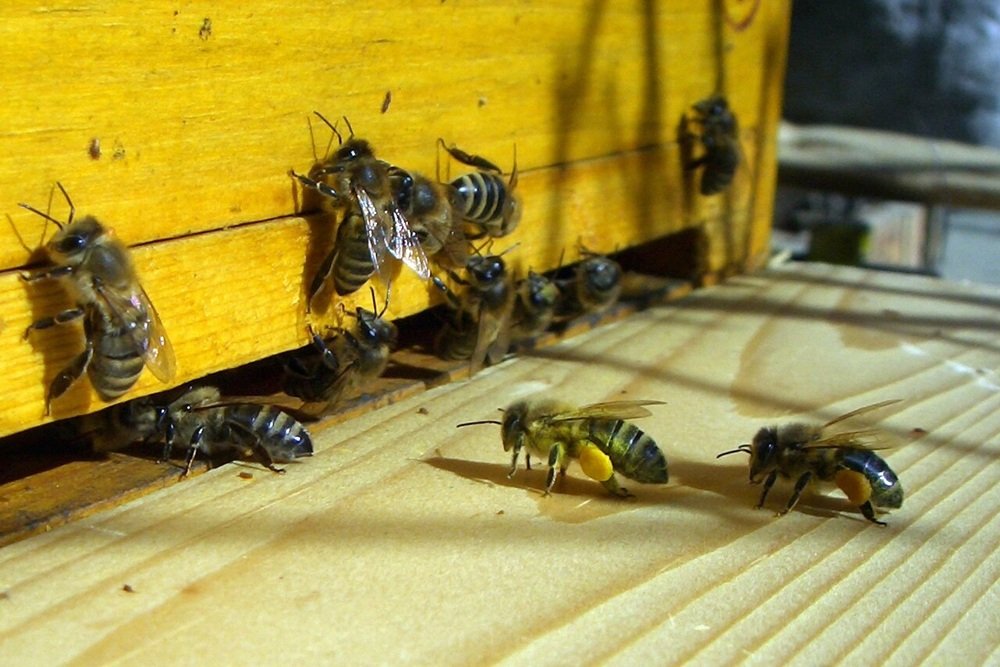
You don’t need to pull frames to know if your new queen is working! Keep an eye on the hive entrance:
- No/Low Pollen: When there is no queen or open brood, field bees collect mostly nectar. Pollen traffic will drop significantly because pollen is primarily needed to feed young, developing larvae.
- Heavy Pollen Returns: When you see worker bees arriving thick and fast with heavy pollen loads packed onto their hind legs, it is a fantastic sign that eggs have hatched and the new queen is successfully laying open brood!
What to Do If You Find Swarm Cells on the Bottom of the Frame
If the cells are along the bottom bars and actively filled or capped, squashing them rarely stops the swarm instinct—the bees will simply build more. Instead, execute an artificial swarm or a colony split:
- Locate the old queen (or ensure she is still present).
- Move her, along with 1–2 frames of brood and food, into a new hive or nucleus box to simulate a swarm.
- Leave one strong, healthy queen cell in the original hive and carefully knock down the remaining swarm cells to prevent secondary swarms.
Featured image Photo by Spyros Skareas